Let me be direct about something most sellers learn the hard way — bad color in a product photo can kill a sale before the buyer even reads the title.
I have spent a lot of time testing product image workflows, and in my experience, color accuracy is one of the most underestimated elements of ecommerce photography. A dress that looks muddy grey-green on a listing but arrives as a crisp olive is not a photography problem. It is a trust problem. And fixing it afterwards in expensive software like Lightroom or Photoshop is not something most sellers have the time, tools, or skills for.
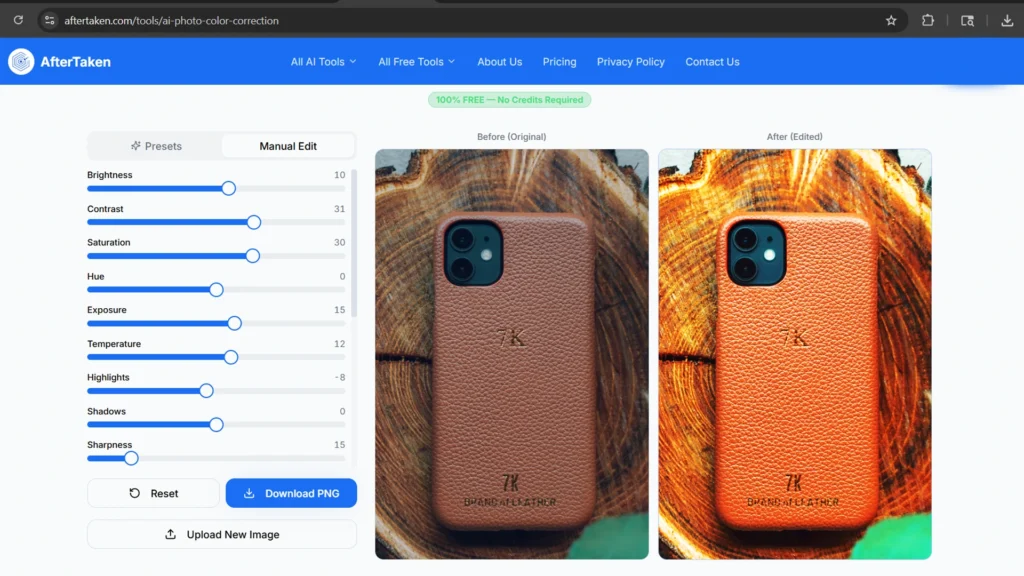
That is exactly why I built AfterTaken’s free AI photo color correction tool — a browser-based tool that lets anyone fix product image colors, correct white balance, and apply professional color grading in seconds, at zero cost.
Try it free — AfterTaken AI Photo Color Correction Tool — 100% free, no credits required, no signup needed.
In this post, I will walk you through what the tool does, how each feature works, and why getting color right in your product photos matters more than most sellers realize.
Why AI Photo Color Correction Matters for Product Sellers
Color accuracy in product photography is not just an aesthetic preference — it directly affects buyer confidence and return rates.
In my experience testing product listings across different categories, listings with accurate, vibrant color consistently outperformed those with flat or inaccurate tones — even when the products themselves were identical. Buyers are making purchasing decisions based on what they see on screen. If the color on screen does not match the product they receive, you get returns, bad reviews, and lost trust.
The most common color problems I see in product photos are:
- White balance issues — photos that look too yellow (warm) or too blue (cool) under artificial lighting
- Flat, washed-out images — low contrast and dull saturation that make products look cheap
- Overexposed highlights — product details lost in blown-out bright areas
- Muddy shadows — dark areas with no detail, especially in textured products like fabric or leather
- Inaccurate fabric colors — what looks cream on screen arrives as white, or what looks navy arrives as black
WHY THIS MATTERS
Color is the number one reason buyers return clothing and accessories purchased online. Accurate color in your product photos directly reduces your return rate — which is one of the highest hidden costs in ecommerce.
What is AfterTaken’s Free AI Photo Color Correction Tool?
AfterTaken’s AI photo color correction tool is a completely free, browser-based image editor designed specifically for product photos. It requires no account, no credits, no software installation, and no design skills.
The tool gives you three ways to improve your product images:
- AI Presets —
- Manual Edit —
- RGB Tone Curve —
Upload your image, choose your approach, see the before and after in real time, and download the corrected image as a PNG. That is the entire workflow.
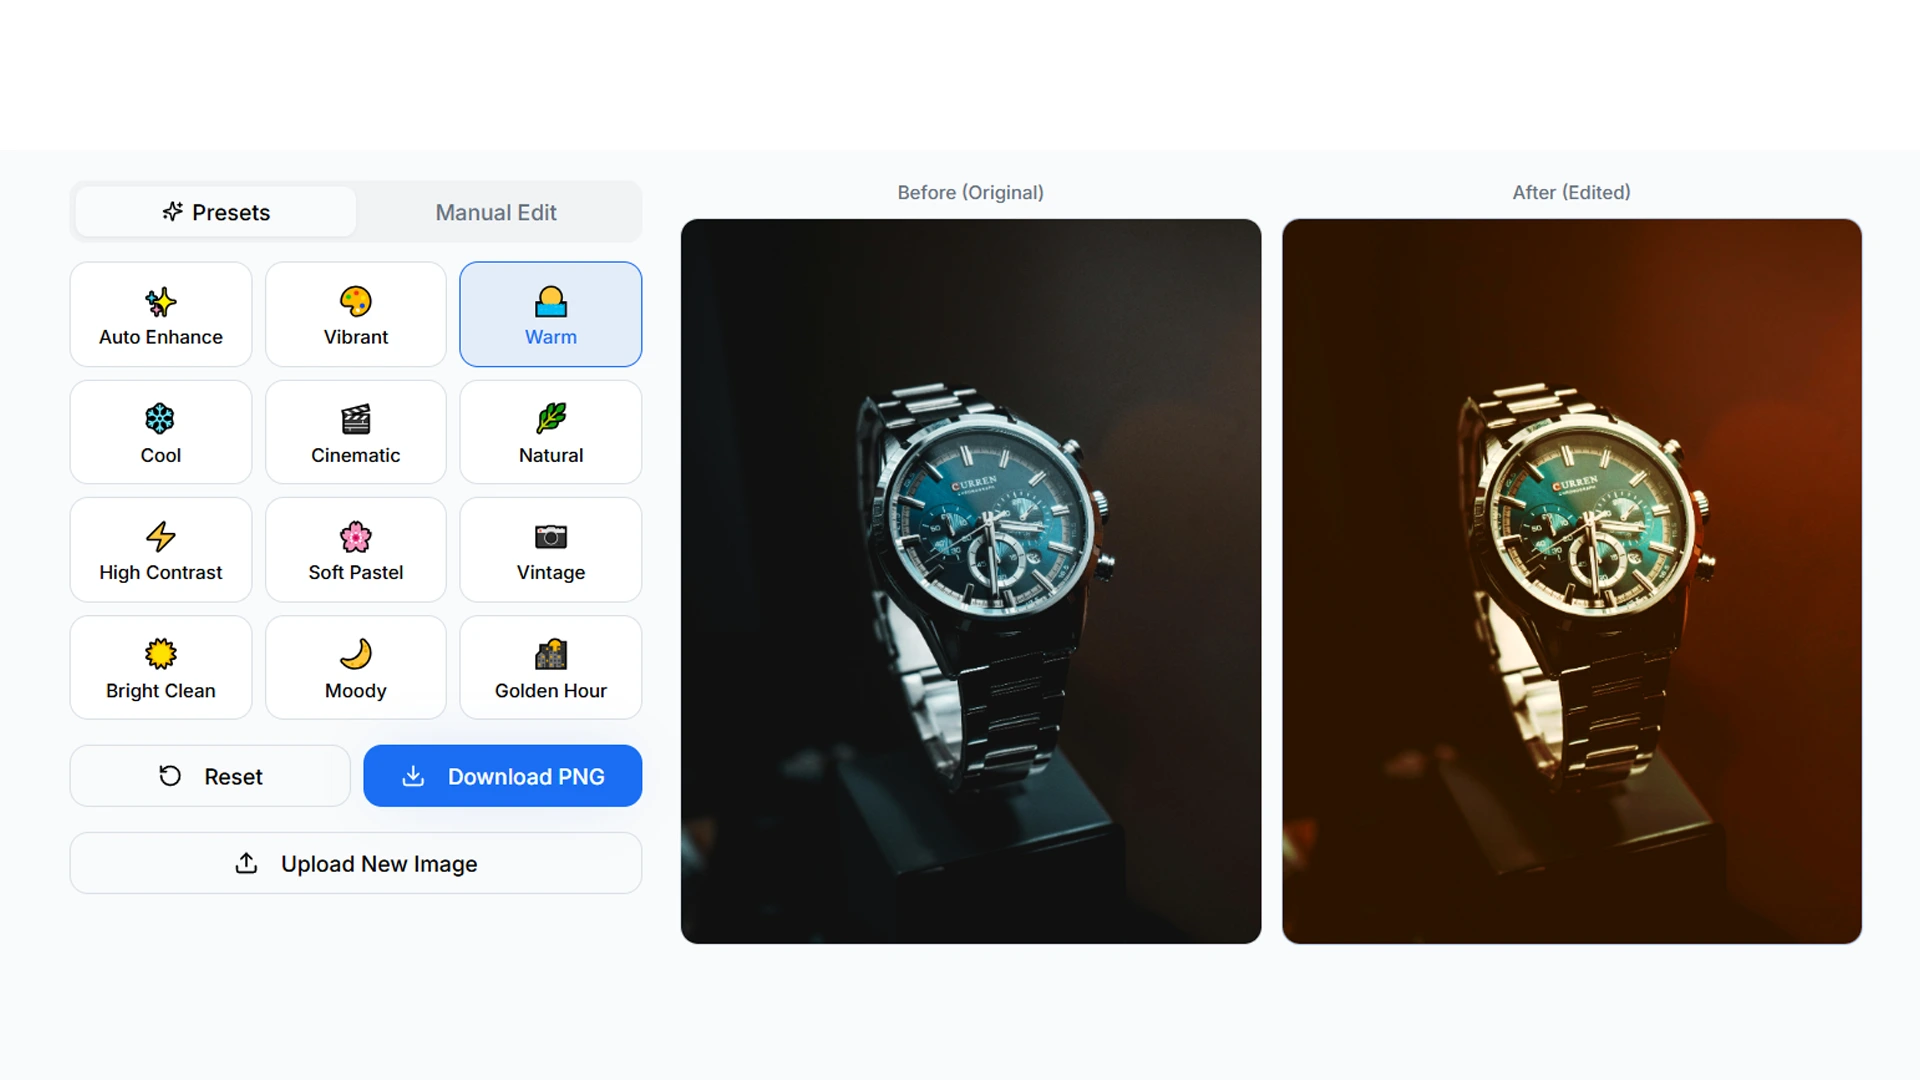
The 12 AI Color Presets — What Each One Does
The Presets tab gives you 12 ready-made color styles. In my testing, most product images respond well to one of these with a single click — no manual adjustment needed at all. Here is what each preset does:
- Auto Enhance — AfterTaken’s AI analyses your image and automatically applies balanced corrections across all tonal ranges. This is the best starting point for any photo — I use it as a first pass on almost every product image.
- Vibrant — Boosts color saturation and contrast, making colors pop without looking unnatural. Works particularly well for brightly colored products — fashion, accessories, toys, and home decor.
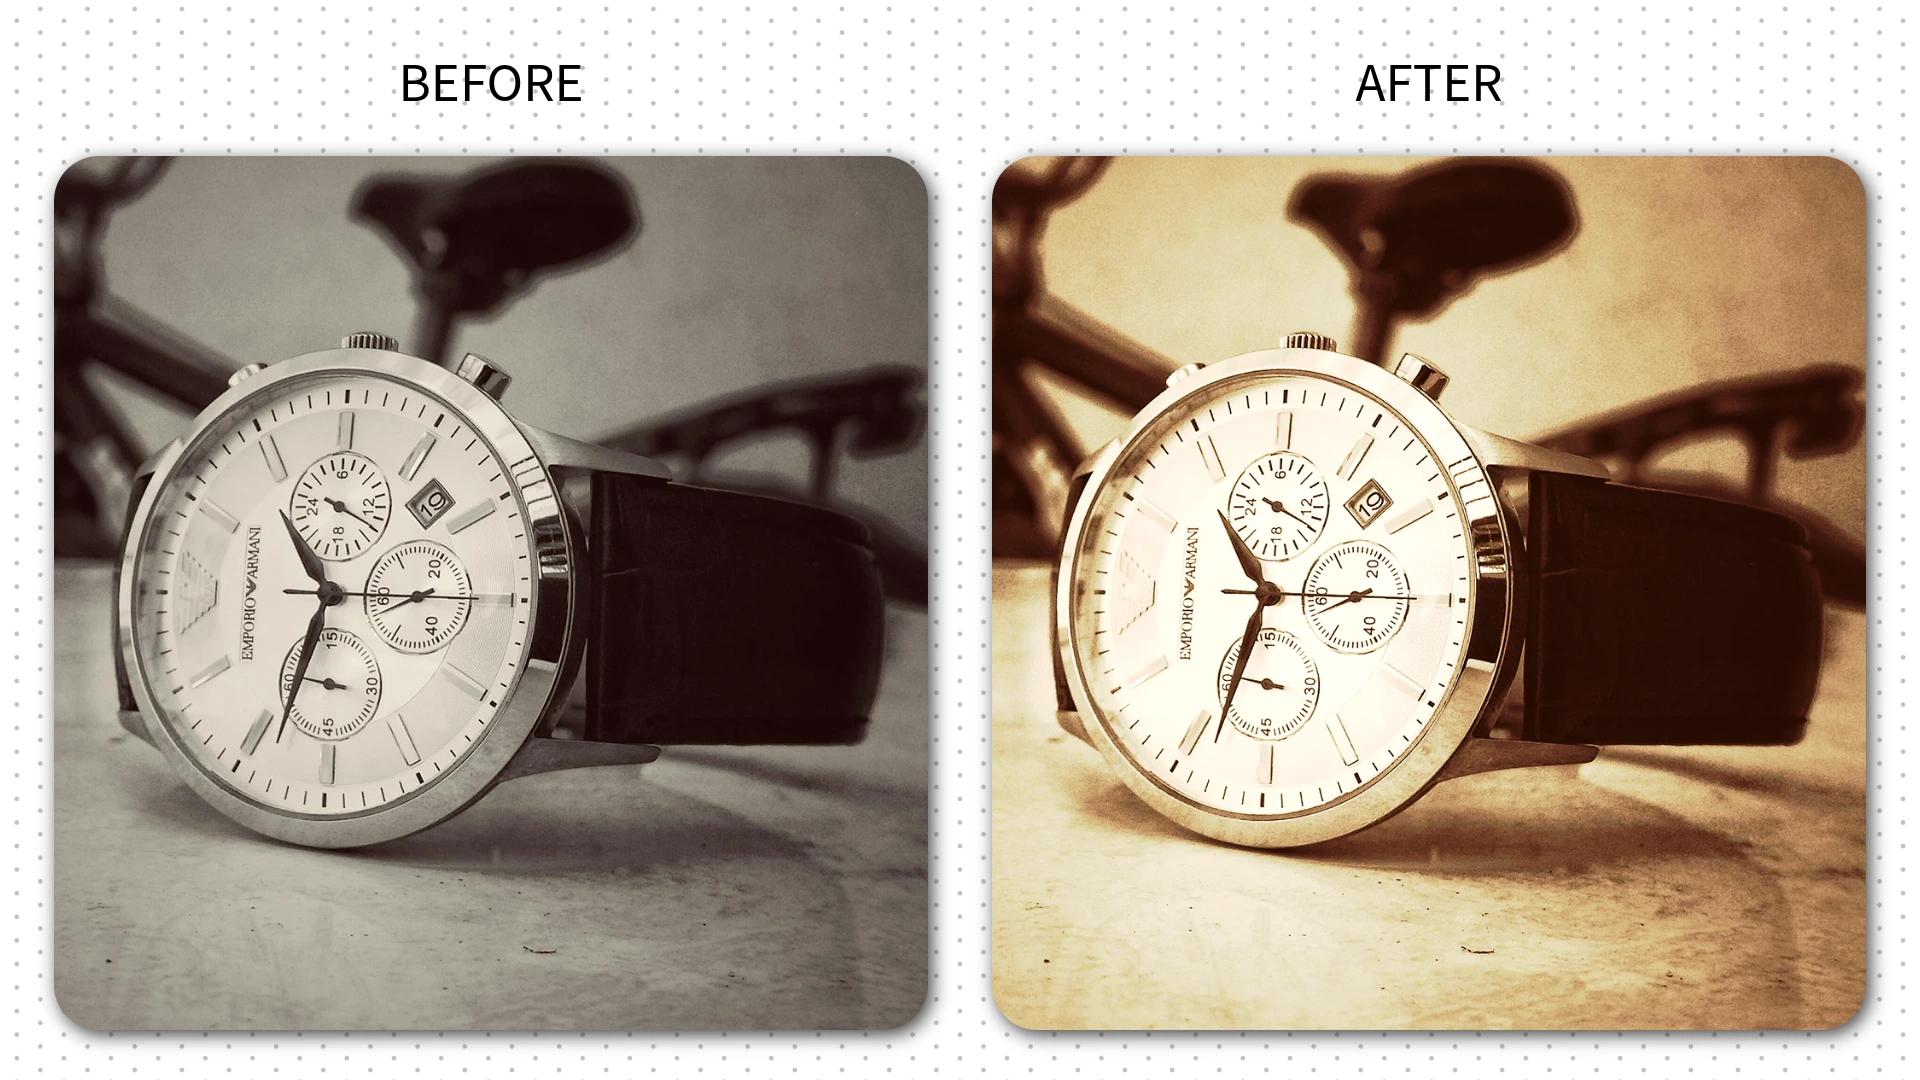
- Warm — Shifts the color temperature toward golden-yellow tones. Ideal for lifestyle product shots, food photography, and wooden or leather products where warmth adds to the appeal.
- Cool — Adds a clean blue-white tone. Works well for tech products, skincare, and beauty items where a clinical, fresh feel communicates quality.
- Cinematic — Applies a film-grade color treatment with slightly lifted blacks and a subtle teal-orange color grade. Useful for premium or luxury product positioning.
- Natural — Corrects white balance and tones without adding any stylistic color treatment. The goal is accuracy — what you see is as close as possible to how the product looks in real life.
- High Contrast — Significantly increases the contrast between highlights and shadows, creating a bold, punchy look. Works well for dark or metallic products.
- Soft Pastel — Reduces contrast slightly and shifts colors toward lighter, softer tones. Ideal for baby products, stationery, skincare, and any brand with a soft or feminine aesthetic.
- Vintage — Adds a warm, faded, film-inspired tone with slightly desaturated colors. Good for handmade, artisanal, or vintage product lines.
- Bright Clean — Increases brightness and lifts shadows to create a fresh, airy look. This is one of my personal favourites for white-background ecommerce photos — it makes the product feel lighter and more premium.
- Moody — Darkens midtones and adds depth, creating a dramatic, editorial feel. Works well for premium lifestyle shots and products positioned in the luxury segment.
- Golden Hour — Simulates the warm, directional light of late afternoon sun. Excellent for outdoor lifestyle shots, fashion, and any product where warmth and energy enhance the appeal.
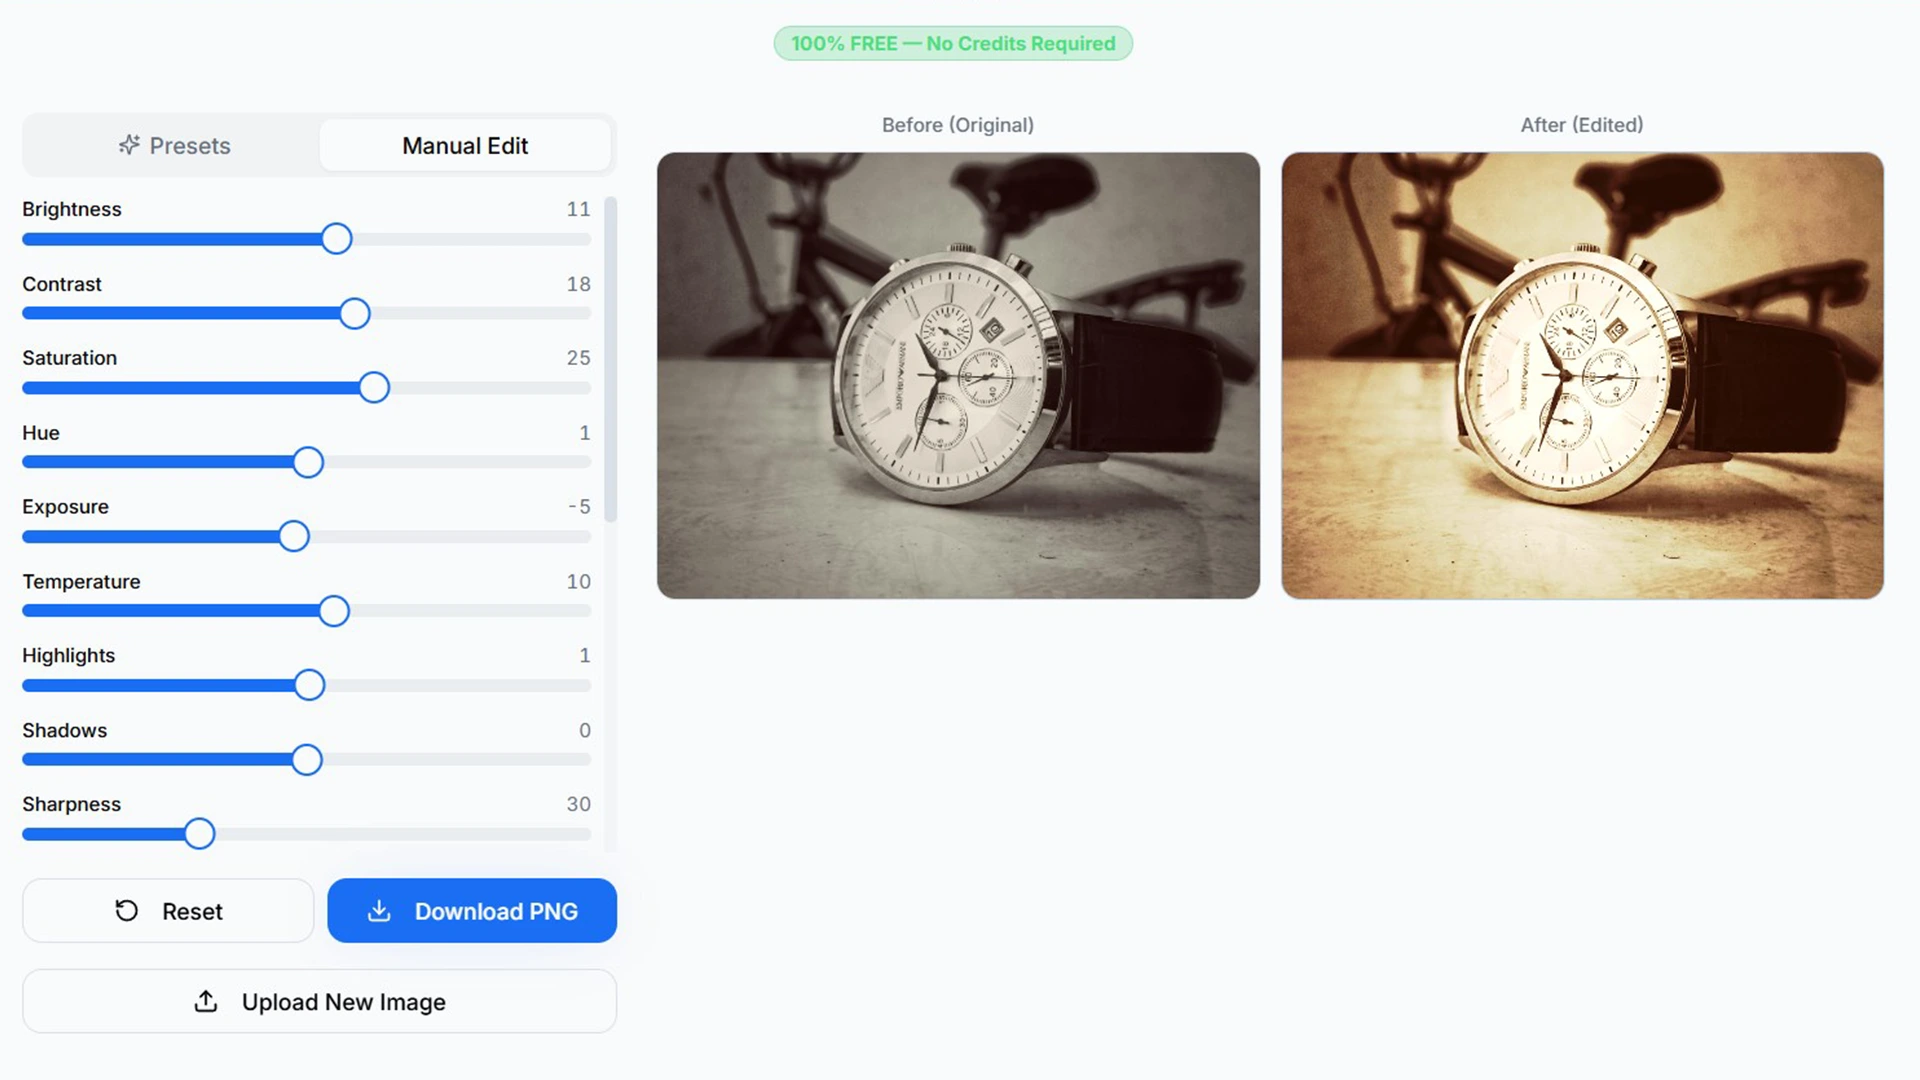
Manual Edit Mode — Full Control Over Your Image
When the presets are not quite right, the Manual Edit tab gives you precise control over nine individual adjustment parameters. Here is what each one does and when to use it:
Brightness
Adjusts the overall lightness or darkness of the image. Use this to fix underexposed photos taken in low light, or to pull back overexposed images that look blown out. In my experience, a brightness adjustment of +10 to +20 is often enough to rescue a photo taken in dim indoor lighting.
Contrast
Controls the difference between the lightest and darkest areas of your image. Increasing contrast makes your product look sharper and more defined. Decreasing it flattens the image and can be useful for creating a soft, editorial look. Most product photos benefit from a slight contrast boost.
Saturation
Adjusts the intensity of all colors in the image. Boosting saturation makes colors more vivid and eye-catching. Reducing it moves toward black and white. In my testing, a modest saturation increase of +15 to +25 is usually the sweet spot for product photos — enough to make colors pop without looking artificial.
Hue
Shifts all the colors in your image around the color wheel. This is a subtle but powerful control for correcting color casts — if your product looks slightly too green or too magenta, a small hue adjustment can correct it without affecting anything else.
Exposure
Similar to brightness but works more like a camera exposure control — affects the entire tonal range together. Use this for broader exposure corrections before fine-tuning with brightness and contrast separately.
Temperature
This is the white balance control. Shift it warmer (positive) to add yellow-orange tones, or cooler (negative) to add blue tones. This is one of the most important controls for product photography — correcting white balance is the single most effective way to fix AI photo color correction in images shot under mixed or artificial lighting.
Highlights
Controls only the brightest areas of your image without affecting midtones or shadows. Use this to recover detail in overexposed areas — like a white shirt that has lost texture in the brightest spots — or to brighten the light areas for a cleaner, more luminous look.
Shadows
Controls only the darkest areas of your image. Lifting shadows reveals detail in dark areas — useful for products with dark surfaces like leather bags or navy fabric where texture can get lost. Reducing shadows adds depth and drama.
Sharpness
Increases the perceived sharpness and edge definition of your image. In my experience, a sharpness value of around 20 to 30 works well for most product photos — it makes fabric texture, stitching, and fine details more visible without creating the noisy, over-processed look that heavy sharpening produces.
RGB Tone Curve — Professional Color Grading in Your Browser
The RGB Tone Curve is the most powerful feature in the tool — and the one that sets it apart from basic photo editors.
A tone curve lets you control brightness and contrast at specific points in the tonal range, from shadows to highlights, by dragging points on a curve graph. Pull a point up to brighten that tonal range, pull it down to darken it. The classic S-curve — bright highlights and dark shadows — is the foundation of almost every professional color grade.
In my experience, most sellers will not need the tone curve for everyday product photo corrections — the presets and manual sliders handle the majority of use cases. But if you want precise control over how shadows transition to midtones, or you want to create a specific color-graded look for a brand campaign, the tone curve is where you go.
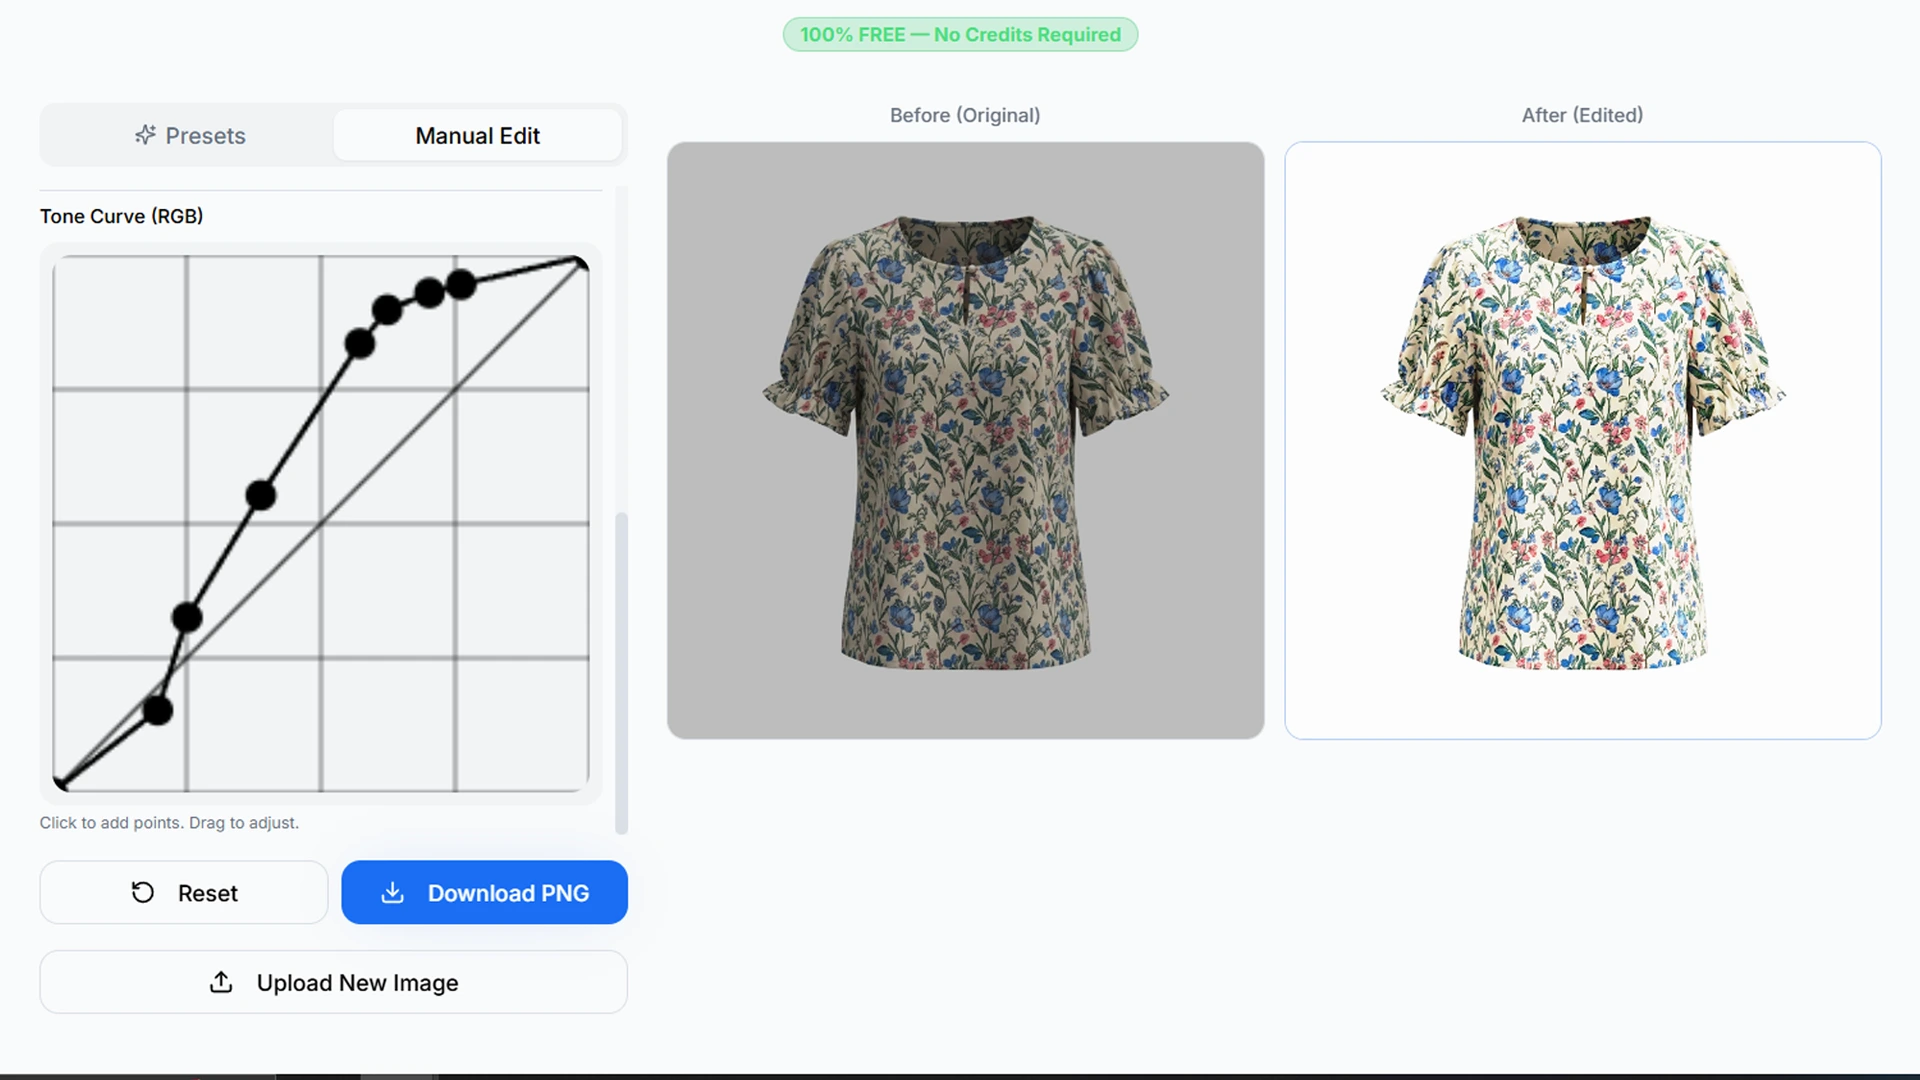
PROFESSIONAL TIP
For a clean, professional product photo look, try a gentle S-curve — slightly raise the highlights (upper right area of the curve) and slightly lower the shadows (lower left area). This simple adjustment adds depth and contrast that makes products look more three-dimensional and premium.
Who Should Use This Free AI Photo Color Correction Tool?
The short answer is: anyone who takes product photos and wants them to look better, faster, and for free. More specifically:
- Amazon and Flipkart sellers —
- Shopify and D2C brand owners —
- Fashion and apparel sellers —
- Food and beverage brands —
- Photographers —
- Social media content creators —
How to Use the Tool — Step by Step
The entire process takes under two minutes from upload to download:
- Go to AfterTaken.com/tools/ai-photo-color-correction — no account or credits needed
- Upload your product image by dragging and dropping or clicking Choose Image
- Start with the Presets tab — click through the 12 options and watch the Before/After preview update in real time
- If you need more control, switch to Manual Edit and adjust individual sliders
- For advanced users, open the RGB Tone Curve and make precise tonal adjustments
- Click Download PNG to save your corrected image at full resolution
Free AI Photo Enhancer vs Paid Tools — Is There a Difference?
This is a fair question, and I will answer it honestly.
For the majority of product photo corrections — white balance, brightness, contrast, saturation, and basic color grading — a well-built free AI photo enhancer like AfterTaken’s tool delivers results that are indistinguishable from what you would get in Lightroom or Photoshop. The controls are the same. The quality of the output is the same.
Where paid professional tools have an advantage is in batch processing large volumes of images, complex selections and masking, and RAW file support. If you are processing hundreds of images per day as a professional photographer, a paid tool makes sense.
But for ecommerce sellers doing regular product image corrections? In my experience, a free AI photo color correction tool with the right set of controls is more than sufficient — and the zero cost means there is genuinely no reason not to use it.
Final Thoughts
If your are an e-commerce seller, graphic designer or freelancer then this tool can add a value in your photo retouching work quickly. No advanced design experience is need to use this AI tool. Just use it unlimited for free.
Related Articles & Next Steps
I hope you got an idea for color correction of image (specially for products) using AfterTaken. Now, you can read the more articles below to use the perfect AI tools for your requirements:
- [AfterTaken AI Review] – AfterTaken provides best AI solution in AI product photography for your e-commerce store.
- [Ghost Mannequin Photography] – Now you can convert your flat-lay or with mannequin clothing image into Ghost Mannequin Photography with few easy steps.
- [Product Color Change AI] – Changing the product color is now very easy by using the few click and you will get desired changed color image in seconds.